Create your email message from scratch |
  
|
Create your email message from scratch |
|
With Mass Mailing News you can create effective, professional email newsletters. No special technical or design skills required to use this software.
Click on the "Message Editor" tab. Begin creating your message.
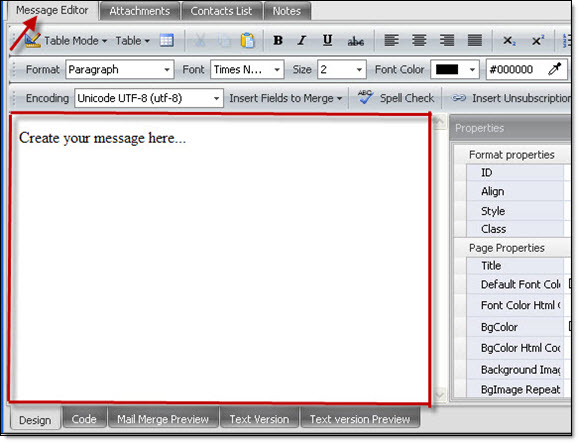
On the right side of the editor, you can see a panel which displays the properties of the elements of the email message.
1.Add a color in the background to appear more professional. From the taskbar, click on the “Back Color” icon and select a color for the background.

The program allows you to create and insert a degraded image in the background of the message. To create and insert a degraded image, you need to click on the “Image” icon and select “Create and insert fade image”. The “Management-Ware Gradient Maker” dialog box will be displayed. Create your degraded image from the selection. Once created, you will be able to insert your degraded image as a background in your messages. In general, the degraded image gives a professional look to the message.
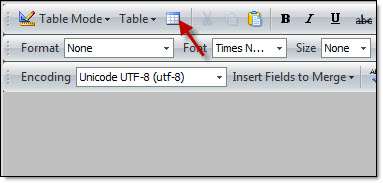
2.Do twice "enter" to leave a little space above the newsletter. Add a table. The entire contents of the message will be added in a large table. From the taskbar, click on the “Table” icon and add a table.
3.Center the table

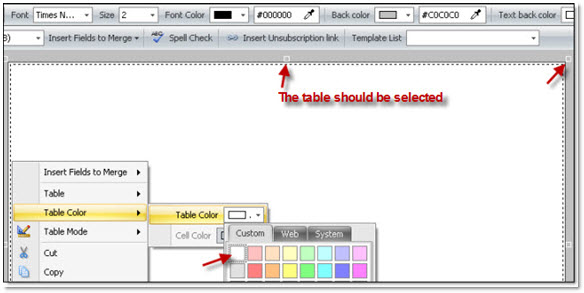
4.Change the color inside the table. To change the color of the table, you must select the table and do right click to display the options. Select ''Table Color'' and ''Table color'' to select the desired color.
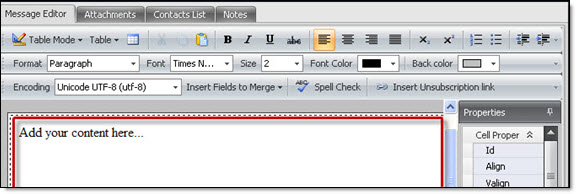
5.Once the table is centered, please align your cursor to start creating your message.
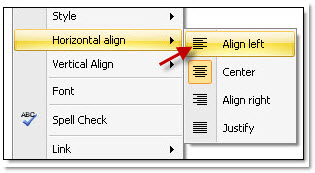
6.To align the cursor, place the cursor within the table and do right click to display the options. Then, choose your alignment.
7.When your cursor is aligned, begin to create your text or copy paste the text. If you copy / paste text into the editor, it’s recommended that it comes from a text file (Note Pad). Texts that come from Microsoft Word contain tags that can deform the font or the text characters.
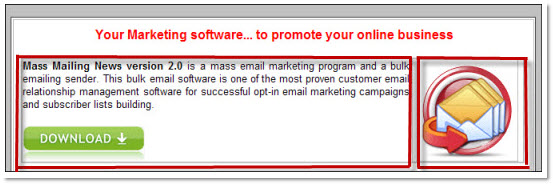
8.In the example below, we have three products with 3 images.
Option 1 :
1)We add a table with 3 rows and 2 columns. Select the table and move the guide line that separates the cells. Move the guide line left to right or from right to left.

2)We add the text in the first column and image in the second column. Once satisfied with the table, we copy twice this table for the other two products.
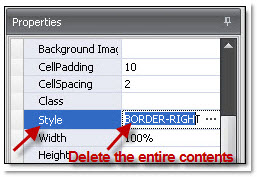
Select the table and then, on the right side of the editor, you will see a panel which displays the properties of the table. Find “Style” and delete the contents in the field.
To change the display mode – from layout view to standard view, simply click on 'Table Mode' and choose ' Standard View '. The change will be done automatically.
How to add an image in the newsletter?
The image can be in your computer or online.
Steps to add an image in the message:
1.Place your cursor in the location where you want the image to be.
2.From the menu, click on “Insertion” and then “Images”.
3.The “Add Image dialog...” dialog box will be displayed automatically. If the image is in your computer, then click on the “Browse” button.
4.Select your image and then click on the “Open” button.
5.Optional – in the “Alternative text” field, you can enter anything you want such as a name (e.g.: Mass Mailing News v2.00). By default, the program aligns the image to the left. You can also re-size, turn and add effects to the image.
6.If you wish to add a link to the image, check the “Link to” box and manually add a hyperlink or copy the link and paste it in the field or click on the “+” button to select a hyperlink address in the list of hyperlinks.
7.Click on the “Ok” button to close the dialog box and to display the image in the message.
Note: When you creating a newsletter, it’s better to put the images on your server online and insert these images in the message. The size of the message will be much lighter. When the images are online, the sending process goes much faster.
How to add an image that we have online?
1.Place your cursor in the location where you want the image to be (e.g. inside the second column)
2.From the menu, click on “Insertion” and then “Images”.
3.The “Add Image dialog...” dialog box will be displayed automatically. Select "Online image" then, in the "Picture source" field enter the complete address e.g. http://www.YourDomainName.com/images/yourImage.gif jpg, png etc.).
4.Select your image and then click on the “Open” button.
5.Optional – in the “Alternative text” field, you can enter anything you want such as a name (e.g.: Mass Mailing News v2.00). By default, the program aligns the image to the left. You can also resize, turn and add effects to the image.
6.If you wish to add a link to the image, check the “Link to” box and manually add a hyperlink or copy the link and paste it in the field or click on the “+” button to select a hyperlink address in the list of hyperlinks.
7.6- Click on the “Ok” button to close the dialog box and to display the image in the message.
9.Once you done with the email message, add a topic (e.g. New Email Tracking Services) in the subject field.
Subject header lines...do they matter? Yes, they really do, nowadays email is the chosen method of communication for most people. Every copywriter and journalist knows the importance of a powerful headline. The same applies for email subject lines, because as much as 40% of a recipient's decision to open an email is based on the subject as well as the sender.
10.Save your message. From the “File” menu, select “Save the mailing list As...”. The “Save the mailing list” dialog box will be displayed. Give a name to your mailing list (Ex: Marketing_E_List) and click on the “Save” button.
11.Add a contact to your list.Click “Contacts” menu and select “Add New contact”. Add your email address and save the data.
12.From the taskbar, click on the “Send” button in order to send the message to yourself.

13.You have to look up on the “Contacts List” tab under the Status column for the sending progress. When an email is sent correctly you will see the message "Send Completed With Success". If you don’t receive this message, it means that your message was not delivered, and you should review the configuration. Once the email is sent, Mass Mailing News has no control over the delivery time.
14.Give the server a few minutes to deliver the message.
15.Once you have received the message, check it and see if there are corrections to do. Some Web-mails does not support certain HTML tags consequently you will not be able to fix them. Once you are done with your test, import your contacts and send your message to these contacts!
Note:
If needed, you can personalize each message by adding merging fileds.
Your message is not delivered:
Double check the settings & the email addresses
Verify that you don’t have a firewall or antivirus like Norton or McAfee that are blocking your outgoing messages
If your Internet service provider or your hosting company limits your outgoing messages, you can than activate the quota controller (see the SMTP settings dialog box). A few providers set a "per day" or "per month" limit in order to control the traffic on their servers. If you have any doubts on the amount of messages you can send daily, contact your Internet provider. If you are sending messages and during that process you realize that you have reached the provider’s quota, the program will not be able to send out the overflow. If you have more than one SMTP address, you need to enter them in the program. During the sending, the software will do the switch between SMTP addresses.
Be patient. Usually the message delivery is instant, but we've seen where the ISP has delayed the delivery of a message for hours.
When you creating a newsletter, it’s better to put the images on your server online and insert these images in the message. The size of the message will be much lighter. When the images are online, the sending process goes much faster.